
Preparing for an AC installation involves more than picking out a new unit. You must take several steps to ensure everything goes smoothly and your home stays cool efficiently. Start by selecting the right AC unit based on size and energy efficiency. Next, schedule a professional assessment to discuss installation costs and warranty terms. Clearing the installation area and checking your electrical system is also imperative. But what about ensuring proper insulation and planning for drainage? These elements are just as significant. Let’s walk through these pivotal steps to make your AC installation successful.
Choose the Right AC Unit
Selecting the appropriate AC unit for your home involves considering critical factors such as size, energy efficiency, and cooling capacity to guarantee top performance and comfort. You’ll want to start by evaluating the size of the unit, ensuring it matches the cooling requirements of your space. Too large a unit can cycle on and off frequently, reducing its efficiency. Conversely, a unit that’s too small won’t cool your home adequately.
Energy efficiency is another vital aspect. Opt for units with a high SEER (Seasonal Energy Efficiency Ratio) rating. Higher SEER ratings mean better energy efficiency, leading to lower operational costs and less environmental impact. Look for ENERGY STAR-rated models, as these units meet stringent efficiency guidelines.
Noise levels shouldn’t be overlooked, either. A noisy AC unit can disrupt your peace and comfort. Check the decibel rating; units below 60 decibels are typically considered quiet. Quiet operation is particularly important in bedrooms or living areas where you spend a lot of time.
Schedule a Professional Assessment
After selecting the appropriate AC unit, the next step is to schedule a professional assessment to guarantee proper installation and peak performance. Contact a certified HVAC technician to evaluate your home’s unique requirements. This visit is important, as the technician will thoroughly inspect the best placement for the AC unit, ensuring ideal airflow and efficiency.
During the assessment, evaluate your budget. Discuss the installation costs and any potential additional expenses that might arise. The technician can provide a detailed estimate, helping you plan financially and avoid unexpected costs. Moreover, inquire about financing options if needed.
Another critical aspect to cover is the warranty. Discuss the terms and conditions of both the unit and the installation service. Ensure you understand what is covered, the duration of the warranty, and any maintenance requirements to keep it valid. This conversation will help protect your investment and ensure long-term satisfaction.
Clear the Installation Area
Remove any obstructions near the designated area to guarantee a smooth AC installation. Ensure there are clear accessibility pathways for the technicians to transport equipment and perform their work efficiently. This preparation will help prevent delays and ensure the installation proceeds without any hindrances.
Remove Obstructions Nearby
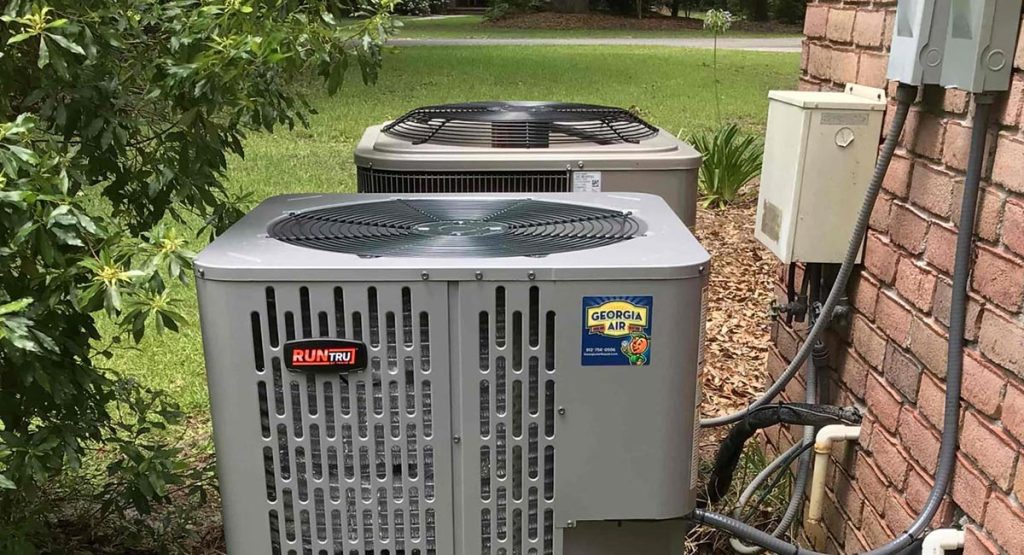
Clear any furniture, plants, or other obstructions from the installation area to provide unhindered access for the technicians and proper airflow for your new AC unit. Clearing this space is crucial for a smooth installation process and guarantees the unit operates efficiently once installed.
First, remove furniture from the vicinity. Heavy furniture can impede the technicians’ ability to work effectively and block vital airflow. Next, trim plants and shrubbery around the outdoor unit. Overgrown foliage can obstruct airflow and reduce the effectiveness of your AC system.
Consider the following actions:
- Remove furniture: Relocate any sofas, tables, or chairs near the installation site.
- Trim plants: Remove any bushes, trees, or other greenery to avoid interference.
- Clear clutter: Remove miscellaneous items like garden tools, toys, or decorative objects.
- Check for hazards: Ensure there are no obstacles, such as loose tiles or uneven ground, that could pose a safety risk to the technicians.
Ensure Accessibility Pathways
Ensure all pathways to the installation site are clear of obstacles to ease the technicians’ movement and equipment transport. Start by evaluating the furniture placement throughout your home. Move any bulky items or furniture that block doorways, hallways, or stairs. This not only aids the technicians’ work but also prevents potential damage to your belongings.
Next, pay attention to pathway lighting, especially if the installation area is in a basement or an attic. Guarantee all lights function properly so the technicians can safely navigate the space. If necessary, add temporary lighting to dimly lit areas. Proper lighting prevents accidents and allows the work to be completed efficiently.
Additionally, consider the exterior pathways if the unit is being installed outside. Clear any debris, garden tools, or outdoor furniture that might obstruct the path from the driveway to the installation site. If the weather is inclement, ensure the pathway is free from ice, snow, or puddles.
Check Your Electrical System
Before installing your new AC unit, verify the amperage capacity of your circuit breaker to ensure your electrical system can handle the increased load. Start by checking if your circuit can accommodate the additional electrical demand. The AC unit’s specifications should indicate the required amperage. Compare this with your breaker’s capacity to prevent overloading, which can cause frequent trips or potential hazards.
If your current system isn’t sufficient, consider a wiring upgrade. Upgrading ensures circuit compatibility and avoids potential electrical issues. Engage a licensed electrician to inspect your home’s wiring and confirm it meets the necessary standards.
Here are key steps to follow:
- Verify Circuit Breaker Capacity: Confirm your breaker can support the AC unit’s amperage requirements.
- Inspect Existing Wiring: Check for any signs of wear or outdated wiring that may need upgrading.
- Consult a Professional: Have an electrician evaluate and upgrade your electrical panel for added safety and efficiency.
- Obtain Necessary Permits: Ensure all electrical work complies with local codes and regulations.
Ensure Proper Insulation
You should guarantee proper insulation throughout your home to optimize your AC system’s efficiency. Start by sealing gaps in your windows, insulating your attic space thoroughly, and weatherproofing your exterior doors. These steps will help maintain a consistent indoor temperature and reduce energy consumption.
Seal Window Gaps
Sealing window gaps ensures your home is properly insulated for maximum AC efficiency. Start by inspecting each window for any visible gaps or cracks. Small openings can lead to significant energy loss, reducing your AC’s effectiveness. Use weather stripping to seal gaps around the window frame to address this. This material is durable and easy to apply, providing a tight seal to prevent air leakage.
Additionally, caulking gaps is important to eliminate drafts. Use a high-quality exterior caulk to fill in cracks where the window frame meets the wall. This will prevent conditioned air from escaping and unconditioned air from entering, maintaining a stable indoor temperature.
Pay attention to:
- Types of weather stripping: Depending on your window type, you can choose from adhesive-backed foam, V-strip, or rubber weather stripping.
- Caulking material: Opt for a silicone-based caulk for flexibility and durability.
- Application tools: Use a caulk gun for precision and a putty knife to smooth out the caulk.
- Inspection frequency: Regularly check window seals and reapply as necessary to maintain insulation.
Insulate Attic Space
After sealing window gaps, the next step is ensuring your attic space is properly insulated to maximize AC efficiency. Start by evaluating your attic ventilation. Proper ventilation allows hot air to escape, reducing the burden on your AC system. Check for existing vents and make sure they’re not obstructed. Additional vents, such as a ridge or soffit, can improve airflow.
Next, consider adding radiant barriers. These are reflective materials installed under the roof to reduce heat transfer. Radiant barriers can greatly lower attic temperatures, making your home easier to cool. They’re particularly effective in hot climates and can improve the overall performance of your AC system.
You should also inspect the existing insulation. Use materials like fiberglass or cellulose to fill any gaps or thin spots. Aim for an insulation level of R-38 or higher to ensure ideal thermal resistance. Proper insulation keeps your home comfortable and reduces energy consumption, benefiting your household and the environment.
Weatherproof Exterior Doors
Maintaining your exterior doors’ weatherproofing is crucial for preserving energy efficiency and optimizing the performance of your AC system. Start by evaluating your door materials. Solid wood or insulated steel doors provide better insulation compared to hollow-core doors. Next, focus on sealing techniques to prevent air leaks, which can undermine your AC’s efficiency.
Here are key steps to guarantee proper insulation:
- Inspect and Replace Weatherstripping: Old or damaged weatherstripping around your door frame can let in drafts. Replace it with new, high-quality material for an effective seal.
- Install Door Sweeps: Attach door sweeps to the bottom of your doors to block drafts. They’re easy to install and can greatly improve insulation.
- Use Caulk for Gaps: Identify gaps or cracks around the door frame and fill them with caulk. This simple step prevents unwanted airflow.
- Check Door Fit: Ensure the door fits snugly within its frame. Consider adjusting the door or adding a threshold to improve the seal if there are noticeable gaps.
Plan for Drainage
Proper drainage is crucial to prevent water damage and guarantee the longevity of your new AC unit. Begin by ensuring the area around your AC unit has an adequate drainage slope. This slope directs water away from the unit, minimizing the risk of pooling, which can lead to corrosion and other damage. Aim for a minimum slope of 1 inch per foot, but adjust based on your specific terrain and climate conditions.
Additionally, consider installing a condensate pump. This device efficiently removes the condensation your AC unit produces, which is especially useful if your unit is located in a basement or a space below the main drainage line. The pump will collect water from the drain pan and pump it to an appropriate drainage point, ensuring that excess moisture doesn’t accumulate around your unit.
Inspect the existing drains and clear any blockages to promote smooth water flow. Check connections for leaks and ensure all drainage lines are securely fastened. A well-planned drainage system protects your AC unit and prevents potential damage to your home’s foundation and surrounding areas. These steps demonstrate your commitment to serving others by maintaining a safe and efficient home environment.
Arrange for Ductwork Inspection
Before AC installation, schedule a professional inspection of your home’s ductwork to confirm it’s free of leaks, blockages, and other issues that could impede system efficiency. Conducting a thorough inspection is important, especially if your ductwork is older. Over time, ductwork ages and deteriorates, leading to issues such as vent leaks, which can greatly reduce the efficiency of your new AC system.
During the inspection, professionals will typically:
- Check for Vent Leaks: Identifying and sealing any ductwork leaks to ensure that cooled air reaches its intended destination without wastage.
- Assess Ductwork Age: Evaluate the condition of the ductwork. Older duct systems may need repairs or replacements to support excellent AC performance.
- Inspect for Blockages: Ensure no obstructions within the ducts could impede airflow and reduce system efficiency.
- Verify Insulation: Ensure the ductwork is properly insulated to prevent energy loss and maintain the desired temperature.
Prepare a Maintenance Plan
Once your ductwork is inspected and any necessary repairs are made, it’s important to establish a detailed maintenance plan to guarantee your new AC system operates efficiently and reliably. Start by setting up a schedule for regular filter cleaning. Clean filters improve airflow and reduce the system’s workload, enhancing efficiency and longevity. Depending on your AC model and usage, you should clean or replace filters every one to three months.
Next, create a thorough log to track maintenance activities. This log should include dates for filter cleaning, inspections, and repairs. It ensures no maintenance task is overlooked and helps you identify recurring patterns or issues.
Incorporate scheduling reminders into your routine. Use digital tools like calendar apps or specialized maintenance software to set up alerts. These reminders will prompt you when it’s time to perform important tasks such as filter cleaning or professional inspections.
Conclusion
Now that you have the steps to prepare your home for AC installation, it’s time to take action. Imagine your home, perfectly cooled, with an efficient system running seamlessly. To achieve this, you must take one crucial final step to ensure long-term efficiency and prevent costly repairs. Don’t miss out on this vital detail—your ultimate comfort depends on it. Take the next step now and secure your home’s comfort and efficiency for years.
Frequently Asked Questions
How Long Does the AC Installation Process Usually Take?
The installation timeline for an AC unit typically takes 4-8 hours. Follow preparation tips like clearing work areas and confirming electrical compatibility to guarantee efficiency. Your proactive steps will expedite the process and better serve your household.
Can I Stay at Home During the AC Installation?
As the installers hum through their tasks, you can stay at home and engage in smooth installer interaction. Follow safety precautions to keep everything flowing seamlessly while they work. Your presence can aid the process.
What Should I Do With My Pets During Installation?
Guarantee pet safety by temporarily relocating them to a quiet, secure area during the installation. This prevents stress and potential hazards from the noise and commotion, guaranteeing the pets’ well-being and a smoother installation process.
Are There Any Permits Required for AC Installation?
You might think permits aren’t needed, but they guarantee safety and compliance. Permit costs vary by location, and inspection requirements ensure your installation meets all codes. Always check local regulations to avoid unexpected issues.
How Can I Reduce Noise From the New AC Unit?
To reduce noise from your new AC unit, install soundproof barriers around it to block sound waves. Use vibration dampeners to minimize vibrations. This guarantees a quieter environment, enhancing comfort for those you serve.