

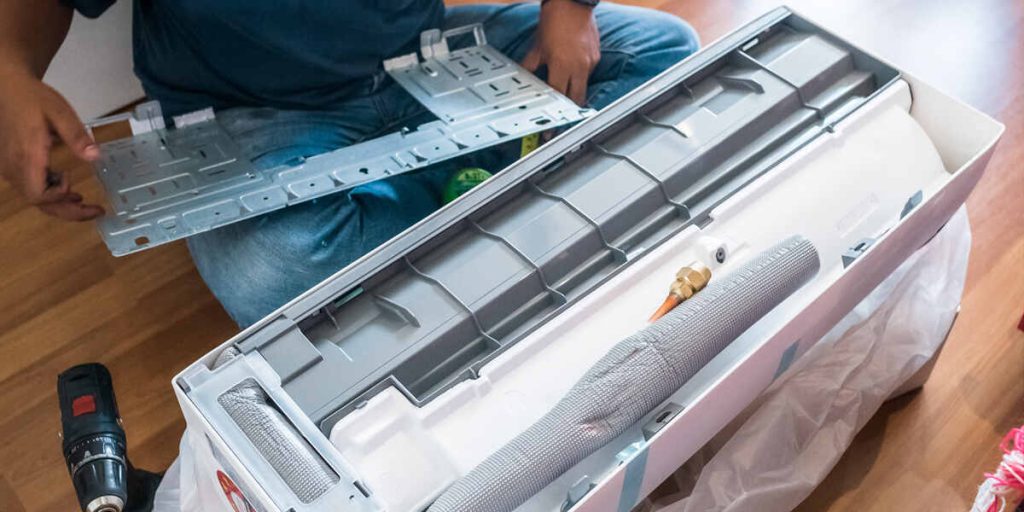
It’s no coincidence that you’re wondering about installing an AC unit yourself just as the summer heat peaks. Before jumping into a DIY project, you need to assess your technical skills and knowledge of electrical systems. Understanding the different types of AC units, necessary tools, and safety precautions is essential. While DIY installations can save money and offer a sense of accomplishment, they come with significant risks, such as electrical hazards and performance issues. Are you prepared to tackle these challenges, or should you consider professional help? Let’s explore what you need to know.
Assessing Your Skills
Before attempting to install an AC unit, it’s vital to honestly assess your technical skills and familiarity with electrical systems. Gauging your comfort level with wiring, mounting heavy equipment, and configuring controls would help. If you’re not confident, it’s safer and more effective to seek professional help. Start by asking yourself if you know how to safely shut off the power at the breaker box. You’ll need to handle electrical wiring, which requires precision and understanding of local electrical codes. If you’re unsure, this is a red flag.
Next, assess your ability to use tools like a multimeter, drill, and level. Proper installation involves measuring, drilling, and possibly cutting through walls, which demands accuracy. Additionally, you should be comfortable reading and understanding the AC unit’s manual, as it contains vital installation steps and safety warnings.
Understanding AC Types
Once you’ve assessed your skills and decided to proceed, it’s important to understand the different types of AC units available before making a selection. The most common types include window units, portable units, split systems, and central air conditioning systems. Each type has its own installation requirements and safety considerations. Window units are relatively easy to install but require a secure fit in a standard window frame. You’ll need to measure accurately and make sure the unit is properly supported to prevent it from falling. Portable units offer flexibility as they can be moved between rooms, but they still require a venting system to expel hot air outside.
Split systems, also known as ductless mini-splits, consist of an indoor unit and an outdoor compressor. These units are more energy-efficient and quieter but involve more complex installation, including mounting the indoor unit and running refrigerant lines. Central air conditioning systems are the most thorough, providing whole-house cooling through a network of ducts. Installing a central system requires significant HVAC knowledge, including electrical work, refrigerant handling, and ductwork modification.
Tools and Materials
To install an AC unit safely and efficiently, you’ll need a specific set of tools and materials. Start with a reliable set of hand tools, including screwdrivers, pliers, and a wrench set. A power drill with various bits will help you create precise mounting holes. A stud finder guarantees secure placement by locating wall studs. You’ll also need a level to confirm the unit is installed evenly, preventing operational issues. A tape measure is essential for accurate dimensions. For the electrical components, wire strippers, electrical tape, and a voltage tester are essential. Materials include mounting brackets, screws, and wall anchors tailored to your AC unit’s specifications. Sealant or caulk is required to insulate gaps and prevent air leaks, enhancing efficiency.
Don’t forget a vacuum pump and manifold gauge set for refrigerant lines; these tools guarantee proper vacuuming and refrigerant charging. An HVAC-rated hose assures leak-free connections. Lastly, personal protective equipment (PPE) such as gloves and safety goggles is critical for your safety. These tools and materials will help you install your AC unit effectively, making certain it serves you and others efficiently and safely.
Safety Precautions
When installing an AC unit, prioritize your safety by wearing personal protective equipment (PPE) such as gloves, safety goggles, and non-slip shoes. These items protect you from potential hazards, guaranteeing a safer installation process. Additionally, follow these essential safety guidelines:
- Secure the Installation Area: Verify the area around the installation site is clear of obstacles. This reduces the risk of tripping or falling while handling heavy components.
- Use Proper Lifting Techniques: When moving the AC unit, bend your knees and keep your back straight to avoid injuries. If the unit is too heavy, enlist help instead of attempting to lift it alone.
- Stabilize the Unit: Confirm that the support brackets and mounting surface can handle the unit’s weight before mounting. Unstable installations can lead to accidents or damage to the unit and property.
- Ventilation: Ensure the work area is well-ventilated, especially when dealing with refrigerants. Inhaling these chemicals can be harmful, and proper ventilation minimizes this risk.
Electrical Considerations
Make certain you turn off the power supply at the circuit breaker before starting any electrical work on your AC unit. This step guarantees your safety and prevents any accidental electrical shocks. Next, verify the voltage requirements of your AC unit and match them with your home’s electrical system. Most residential AC units require a 220-240V outlet, so verify your wiring supports this voltage.
You’ll need to install a dedicated circuit for the AC unit to avoid overloading your existing electrical system. Use appropriate gauge wiring as specified by the unit’s manual. Typically, 12-gauge wire is suitable for most residential units, but always verified with the manufacturer’s specifications. Grounding the unit is vital to prevent electrical faults. Connect the ground wire securely to the designated grounding terminal.
Double-check connections for tightness to avoid any loose wires that could cause short circuits. Additionally, install a disconnect box near your AC unit. This allows you to cut off power for maintenance or emergencies quickly. Follow local electrical codes and regulations to guarantee compliance and safety.
Handling Refrigerants
When handling refrigerants, use the proper personal protective equipment (PPE) to prevent exposure to harmful chemicals and cold burns. Refrigerants are essential for your AC system, but they can be hazardous if not managed correctly. Always wear safety goggles, insulated gloves, long sleeves, and a face shield to protect yourself.
Here are some critical steps for handling refrigerants safely:
- Certification: Ascertain you have the proper EPA certification for handling refrigerants. It’s illegal to work with these substances without proper training and credentials.
- Leak Detection: Use an electronic leak detector or a UV dye to identify any leaks in the system. Leaks affect performance and pose environmental risks.
- Recovery Machine: Use a certified refrigerant recovery machine to remove refrigerants from the system safely. This prevents the release of harmful chemicals into the atmosphere.
- Proper Storage: Store refrigerant containers in an upright position, away from heat sources, and ascertain they are correctly labeled. Improper storage can lead to dangerous leaks or explosions.
Ductwork Requirements
Guarantee your ductwork is appropriately sized and sealed to optimize your AC system’s efficiency and performance. Properly sized ductwork guarantees that air flows evenly throughout your home, preventing hot spots and reducing strain on the system. Use a Manual D calculation to determine the correct duct size based on your home’s square footage, insulation, and other factors. An undersized duct can restrict airflow, while an oversized one can lead to inefficiencies and increased energy consumption.
Sealing is equally essential. Leaky ducts can lose up to 30% of conditioned air before it even reaches your living spaces, leading to higher utility bills and uneven cooling. Use mastic sealant or metal-backed tape to cover all joints and seams. Avoid using standard duct tape, as it can deteriorate quickly. Insulate ducts in unconditioned spaces, such as attics or crawl spaces, to prevent energy loss and condensation.
Safety is paramount. When working with duct materials, wear protective gear, including gloves and safety glasses. Use a ladder safely and verify that the work area is ventilated. By meticulously sizing and sealing your ductwork, you’ll enhance your AC’s performance and contribute to a more comfortable living environment for those you care about.
Pros and Cons
Considering the careful attention required for ductwork, it’s important to weigh the pros and cons of installing an AC yourself. Understanding both aspects will guide you toward a decision that guarantees peak performance and safety.
Pros
- Cost Savings: Doing the installation yourself can save on labor costs, which can be quite substantial.
- Schedule Flexibility: You’re not dependent on a contractor’s availability, allowing you to work on your own timeline.
- Personal Satisfaction: Completing a technical project can be incredibly rewarding.
- Customization: You have full control over the installation process, guaranteeing everything meets your specific needs.
Cons
- Technical Expertise: HVAC systems are complex, requiring specialized knowledge of electrical systems, refrigerants, and ductwork.
- Safety Risks: Improper installation can lead to electrical hazards, refrigerant leaks, and structural issues.
- Time-Consuming: The installation process can be lengthy, particularly if you’re unfamiliar with the technical aspects.
- Warranty Issues: Many manufacturers’ warranties become void if the installation isn’t performed by a certified professional.
Carefully consider these points before installing an AC unit yourself. Prioritize safety and performance to effectively serve your household’s cooling needs.
Conclusion
Sure, go ahead and install that AC unit yourself—what could possibly go wrong? You’ve got the tools, a basic understanding of electrical systems, and a familial disdain for reading safety guidelines. Remember, handling refrigerants and ductwork is child’s play! But seriously, if you’re feeling even a smidge uncertain, let the professionals handle it. After all, who doesn’t enjoy a functioning AC and a house that hasn’t caught fire?
Frequently Asked Questions
How Much Does It Typically Cost to Install an AC Unit Yourself?
Installing an AC unit yourself typically costs between $500 and $1,500 for materials, depending on the unit and tools needed. To protect yourself and others, follow safety guidelines and local codes.
What Permits Are Required for DIY AC Installation?
For DIY AC installation, you’ll need to obtain electrical and mechanical permits. Follow local building codes and safety regulations. Contact your local building department for specific requirements and guidelines to ensure compliance.
How Do You Dispose of an Old AC Unit Responsibly?
Imagine the hum of your old AC finally silencing. To dispose of it responsibly, contact a certified technician to remove refrigerants safely. Then, recycle the unit at an authorized facility, ensuring environmental safety and community well-being.
What Are the Common Mistakes to Avoid When Installing an AC Yourself?
You must avoid incorrect sizing, improper placement, and neglecting electrical codes. Guarantee secure mounting, correct refrigerant levels, and proper insulation. Don’t skip safety protocols; always disconnect power before starting work to prevent hazards.