
Imagine trying to bake a cake without knowing the recipe—preparing for AC installation without a clear plan can be just as chaotic. You’ll need to start by evaluating your cooling needs, which depends on room size and occupancy. Picking an appropriately sized and energy-efficient unit is next, and setting a realistic budget that covers both purchase and installation costs is essential. Finding a qualified installer with solid credentials is vital, but that’s the beginning. How you prepare your home can significantly impact the success of the installation. So, what’s the next step to guarantee a seamless process?
Assess Your Cooling Needs
To assess your cooling needs, determine the square footage of the area you want to cool. Measure the length and width of the room, then multiply these numbers to get the total square footage. For multiple rooms, calculate each one separately and add them together. This is essential because it directly impacts the size and efficiency of the air conditioning unit you’ll need.
Next, consider factors such as ceiling height, insulation quality, and the number of windows. Rooms with high ceilings or poor insulation will require more cooling power. Windows, especially those that receive a lot of sunlight, also affect the cooling load. Count all windows and note their orientation, as south- and west-facing windows tend to increase heat gain.
You should also account for heat-generating appliances and the number of occupants. Each person adds approximately 600 BTUs (British Thermal Units) to the cooling load. Similarly, electronic devices and kitchen appliances contribute to the overall heat.
Choose the Right Unit
When selecting the right air conditioning unit, consider both the unit’s cooling capacity and energy efficiency ratings to guarantee peak performance and cost savings. Cooling capacity, measured in British Thermal Units (BTUs), should match the size of the space you aim to cool. An undersized unit will struggle, leading to higher energy bills and wear, while an oversized unit may cycle on and off too frequently, wasting energy and reducing comfort.
To determine the appropriate BTU rating, calculate the area of the room. A general guideline is 20 BTUs per square foot of living space, but factors like ceiling height, insulation quality, and the number of occupants can influence this.
Energy efficiency is equally critical. Look for units with a high Seasonal Energy Efficiency Ratio (SEER). The higher the SEER rating, the more efficiently the unit operates, which translates into lower operating costs and a smaller environmental footprint. Units with Energy Star certification meet rigorous efficiency standards and offer long-term savings.
Set a Budget
Setting a realistic budget is essential for ensuring you get the best value without overspending on your AC installation. Begin by evaluating your financial capacity and considering the costs involved in the process. This will help you make informed decisions and avoid unexpected expenses.
- Initial Purchase Cost: The price of the air conditioning unit itself can vary significantly based on brand, model, and capacity—research different options to find one that meets your needs and fits within your budget.
- Installation Fees: Don’t overlook the cost of professional installation. This can include labor, materials, and any additional work needed to prepare your home for the new system. Request multiple quotes from reputable installers to understand the going rates.
- Maintenance and Operating Costs: Think long-term. Energy efficiency ratings, potential repairs, and regular maintenance will impact your budget over time. Opt for units with good energy efficiency ratings to lower utility bills and reduce operating costs.
Find a Qualified Installer
Identifying a qualified installer is essential for guaranteeing your new AC unit operates efficiently and reliably. Begin by researching local HVAC companies with solid reputations. Look for NATE (North American Technician Excellence) certifications and affiliations with professional organizations like ACCA (Air Conditioning Contractors of America). These credentials indicate a commitment to industry standards.
Check online reviews and ask for recommendations from friends and family. A well-regarded installer will have positive feedback and a history of satisfied customers. Don’t hesitate to request references and follow up with them. Speaking directly with past clients can give insight into the installer’s reliability and professionalism.
Verify that the installer is licensed and insured—licensing guarantees they meet local regulations and standards. Insurance protects you from liability in case of accidents or damages during installation. Ask for proof of both before proceeding.
Schedule the Installation
After selecting a qualified installer, coordinate with them to determine a convenient date and time for your AC installation. Clear communication helps guarantee a smooth process. When scheduling, consider the following:
- Availability of All Parties: Check your calendar and the installer’s availability. Ensure the date works for everyone involved, including any household members who may need to be present.
- Weather Conditions: Though installers can work in various conditions, extreme weather can complicate the process. Aim for a day with favorable weather to avoid delays or complications.
- Time of Day: Installations can take several hours. Schedule the work early in the day to allow ample time for completion and any necessary adjustments.
Confirm all details in writing, including the exact time and anticipated duration. It’s also wise to have a backup date if unforeseen issues arise. Effective scheduling guarantees the installation process is efficient and minimally disruptive to your routine.
Prepare Your Home
Preparing your home for AC installation guarantees a seamless and efficient setup process. Start by verifying that your electrical system can support the new air conditioning unit. Check the voltage and amperage requirements of the AC model and confirm your electrical panel has the capacity. If needed, consult an electrician to upgrade your system.
Next, inspect your existing ductwork for leaks or obstructions. Properly sealed and clean ducts are essential for peak performance. If you identify any issues, you might need to hire a professional to clean or repair your ducts.
Verify that your home has adequate insulation. Proper insulation improves energy efficiency and reduces operating costs. Confirm that your attic, walls, and windows are well-insulated to prevent cool air from escaping.
Lastly, review your thermostat’s compatibility with the new AC unit. Modern AC systems often require programmable or smart thermostats to maximize their efficiency. If your current thermostat isn’t compatible, consider upgrading to a new one.
Clear the Installation Area
Clear at least three feet of space around the installation area to provide adequate room for the technicians to work efficiently. This guarantees they have enough room to maneuver tools and equipment, reducing the risk of accidents or delays. Begin by identifying the exact location where the AC unit will be installed, then follow these steps to clear the area:
- Remove any furniture or obstructions: Move all furniture, decor, or items that could impede technician access. This includes tables, chairs, and any decorative items in the vicinity.
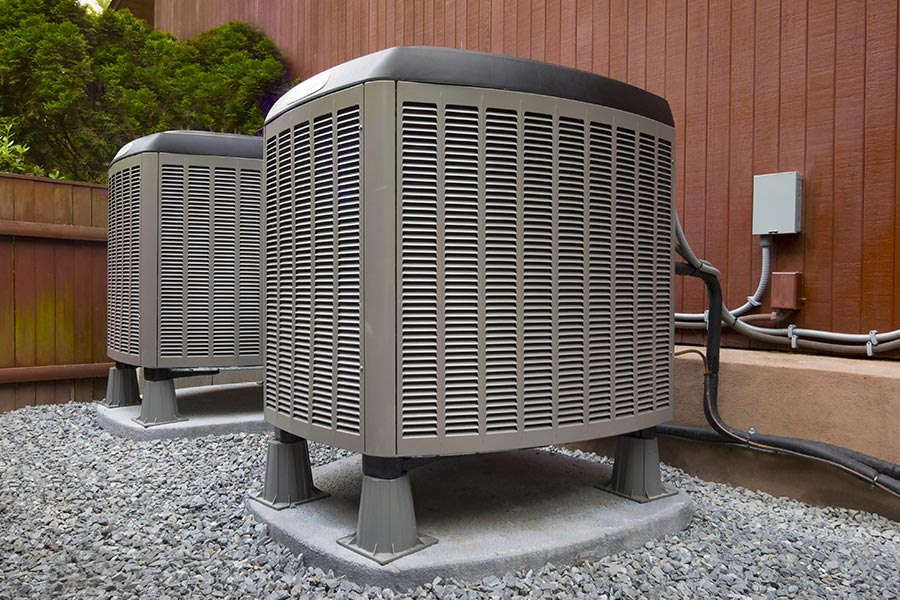
- Clear outdoor obstacles: If the unit will be installed outside, verify the area is free from plants, garden tools, or any other debris that could hinder the installation process.
- Check for electrical hazards: Verify no exposed wires or electrical devices are near the installation site. This is essential for both the safety of the technicians and the integrity of your electrical system.
Conclusion
Now that you’ve completed the installation, don’t you feel more confident about your home’s cooling efficiency? You’re well-prepared with a thorough assessment, a suitable unit, a set budget, and a qualified installer. Ensuring your home is ready and performing a post-installation check guarantees everything’s in order. Remember, a regular maintenance routine will prolong your AC’s life and keep it running smoothly. Enjoy your new, comfortable living environment!
Frequently Asked Questions
How Can I Maintain My AC Unit to Extend Its Lifespan?
You can extend the lifespan of your AC unit by regularly cleaning or replacing filters, checking and sealing ductwork, ensuring proper refrigerant levels, and scheduling annual professional maintenance. These steps help maintain efficiency and prevent breakdowns.
Are There Specific Power Requirements for Different AC Units?
Yes, different AC units have specific power requirements. Check the unit’s manual for voltage and amperage specifications. Confirm your electrical system matches these requirements to avoid issues. Always consult a professional if you’re unsure.
How Can I Improve the Energy Efficiency of My AC System?
You can improve your AC system’s energy efficiency by regularly cleaning or replacing filters, sealing duct leaks, installing a programmable thermostat, and ensuring proper insulation. Additionally, schedule annual professional maintenance to optimize performance and longevity.
What Are the Signs That My AC Unit Needs Professional Service?
Imagine your AC blowing warm air on a sweltering day. If you notice strange noises, leaks, or inconsistent temperatures, it’s time for professional service. These signs indicate potential issues needing immediate attention to guarantee peak performance.